准备工作
- 安装好一台
cobbler服务器
[root@cobbler-server ~]# cat /etc/redhat-release
CentOS Linux release 7.4.1708 (Core)
root@cobbler-server ~]# cobbler version
Cobbler 2.8.3
  source: ?, ?
  build time: Mon May 28 12:41:53 2018
- 准备一张
win7光盘或者ISO
# 解压到/share/win7目录中
[root@cobbler-server win7]# pwd
/share/win7
[root@cobbler-server win7]# ls
autorun.inf  boot  bootmgr  bootmgr.efi  efi  setup.exe  sources  support  upgrade
- 为
cobbler服务器安装wimtools,该工具有mkwinpeimg命令可以创建用于安装win7的PE
[root@cobbler-server win7]# rpm -qa |grep wimtools
wimtools-1.9.2-1.el7.nux.x86_64
[root@cobbler-server win7]# mkwinpeimg
You must specify the name of the image file to create!
Run "mkwinpeimg -h" to see usage information.
- 一个
win7安装自应答xml文件,放在ISO解压目录/share/win7中
[root@cobbler-server win7]# ls -l Autounattend.xml
-rw-r--r-- 1 root root 4634 Aug 26 22:54 Autounattend.xml
安装原理
- 通过
cobbler加载一个win7pe为内存操作系统,在目标服务器上运行; - 将
win7安装包通过smb共享给win7pe; - 在
win7pe中启动setup.exe进行安装系统,可以手动安装也可以使用制作好的自动应答文件安装;
安装步骤
1.准备PE镜像
- 准备一个
install.cmd文件,在运行PE的时候自动运行该脚本
[root@cobbler-server share]# vim install.cmd
[root@cobbler-server share]# cat install.cmd
wpeinit
net use z: \\192.168.56.173\share
z:
cd win7
setup.exe /unattend:Autounattend.xml
- 创建
pe镜像
[root@cobbler-server share]# mkwinpeimg -W /share/win7/ -i -s install.cmd win7pe.iso
:: Copying primary boot files from mounted Windows ISO (/share/win7/)                         [DONE]
:: Exporting image from "/share/win7//sources/boot.wim"                                       [BUSY] Using LZX compression with 1 thread
Archiving file data: 525 MiB of 525 MiB (100%) done
                                                                                              [DONE]
:: Renaming setup.exe to prevent it from bothering us                                         [DONE]
:: Setting "install.cmd" as the script to be executed when Windows PE boots                   [DONE]
:: Rebuilding WIM with changes made                                                           [DONE]
:: Making ISO image "win7pe.iso"                                                              [BUSY] Warning: creating filesystem that does not conform to ISO-9660.
                                                                                              [DONE]
The image (win7pe.iso) is 208791552 bytes.
[root@cobbler-server share]# ls -l win7pe.iso
-rw-r--r-- 1 root root 208791552 Sep  2 23:01 win7pe.iso
2.共享win7镜像
在cobbler服务器上或者其他一个Linux服务器上安装samba服务,
yum install samba -y
systemctl enable smb
修改/etc/samba/smb.conf配置文件,本次配置使用cobbler服务器同时作为samba服务器
[global]
    log file = /var/log/samba/log.%m
    max log size = 5000
    security = user
    guest account = nobody
    map to guest = Bad User
    load printers = yes
    cups options = raw
[share]
	comment = winos
	path 	= /share
	directory mask 	= 0755
	create mask	= 0755
	guest ok	= yes
	writable	= yes
3.开始配置
- 增加发行版
cobbler distro add --name=windows7 --kernel=/var/lib/tftpboot/memdisk --initrd=/share/win7pe.iso --kopts="raw iso"
- 创建一个
ks文件
touch /var/lib/cobbler/kickstarts/win7pe.xml
cobbler profile add --name=windows7 --distro=windows7 --kickstart=/var/lib/cobbler/kickstarts/win7pe.xml
- 查看cobbler distro情况
[root@cobbler-server ~]# cobbler distro list
   windows7
[root@cobbler-server ~]# cobbler distro report --name=windows7
Name                           : windows7
Architecture                   : x86_64
TFTP Boot Files                : {}
Breed                          : windows
Comment                        :
Fetchable Files                : {}
Initrd                         : /share/test.iso
Kernel                         : /var/lib/tftpboot/memdisk
Kernel Options                 : {'raw': '~', 'iso': '~'}
Kernel Options (Post Install)  : {}
Kickstart Metadata             : {}
Management Classes             : []
OS Version                     : generic26
Owners                         : ['admin']
Red Hat Management Key         : <<inherit>>
Red Hat Management Server      : <<inherit>>
Template Files                 : {}
- 注意同步cobbler配置
[root@cobbler-server ~]# cobbler sync
- 创建一个在cobbler服务器dhcp可分发的虚拟服务器,并启动
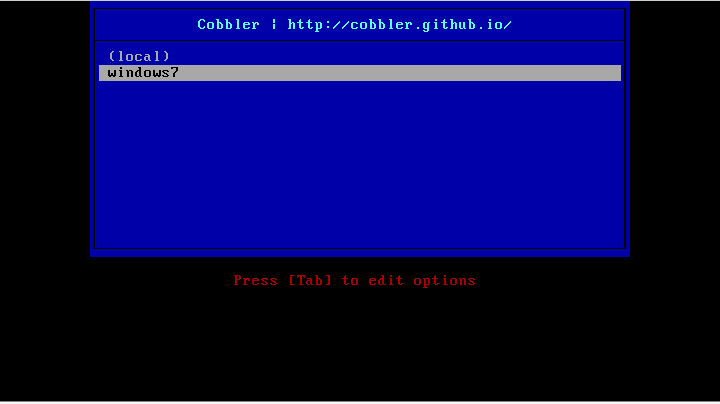
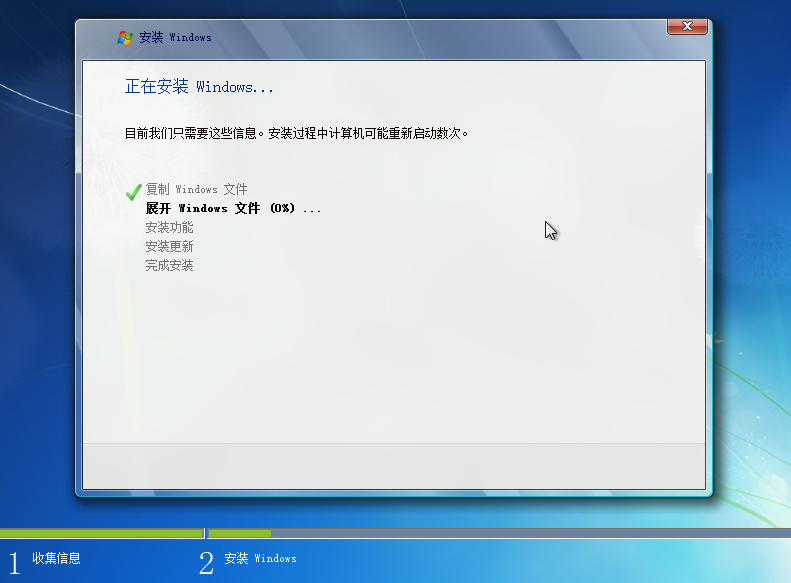
- 系统会自动加载win7pe.iso文件,并进入安装系统PE界面
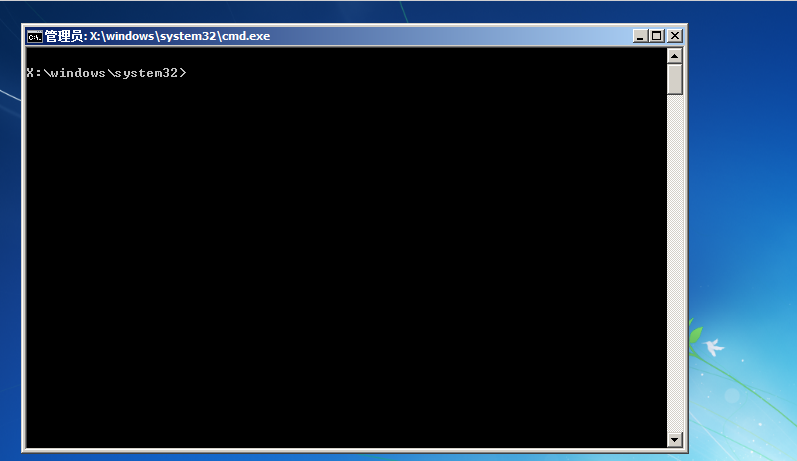
- 自动执行脚本
install.cmd中的命令,并进入安装界面,并完成所有配置