1. install zabbix server
1.1 使用网络源
- 下载
repos
[root@zabbix-server yum.repos.d]# wget -O /etc/yum.repos.d/CentOS-Base.repo https://mirrors.aliyun.com/repo/Centos-7.repo
[root@zabbix-server ~]# rpm -ivh http://repo.zabbix.com/zabbix/4.0/rhel/7/x86_64/zabbix-release-4.0-1.el7.noarch.rpm
- 改为清华源,快
[root@zabbix-server yum.repos.d]# cat zabbix.repo
[zabbix]
name=Zabbix Official Repository - $basearch
baseurl=https://mirrors.tuna.tsinghua.edu.cn/zabbix/zabbix/4.0/rhel/7/$basearch/
enabled=1
gpgcheck=0
gpgkey=file:///etc/pki/rpm-gpg/RPM-GPG-KEY-ZABBIX-A14FE591

[zabbix-non-supported]
name=Zabbix Official Repository non-supported - $basearch
baseurl=https://mirrors.tuna.tsinghua.edu.cn/zabbix/non-supported/rhel/7/$basearch/
enabled=1
gpgkey=file:///etc/pki/rpm-gpg/RPM-GPG-KEY-ZABBIX
gpgcheck=0
1.2 使用本地源
# download pkgs for zabbix
yum install --downloadonly --downloaddirectory=/mnt zabbix-* mariadb-server

# make a repo
cd /mnt/
createrepo .

# make a repo file
cat >/etc/yum.repos.d/zabbix.repo <<EOF
[zabbix-local]
name=zabbix local host
baseurl=file:///mnt/
enabled=1
gpgcheck=0
EOF
1.3 开始安装配置
- install tools and zabbix
[root@zabbix-server yum.repos.d]# yum install wget vim tree -y
[root@zabbix-server yum.repos.d]# yum install zabbix-server-mysql zabbix-web-mysql mariadb-server httpd
- 安装配置数据库
mariadb
[root@zabbix-server yum.repos.d]# systemctl start mariadb-server
[root@zabbix-server yum.repos.d]# systemctl enable mariadb-server
[root@zabbix-server yum.repos.d]# mysql_secure_installation

# 创建数据库和用户
[root@zabbix-server yum.repos.d]# mysql -u root -p
MariaDB [(none)]> create database zabbix character set utf8;
MariaDB [(none)]> grant all privileges on zabbix.* to 'zabbix'@'localhost' identified by 'zabbix';
MariaDB [(none)]> flush privileges;

# 导入数据,导入看了默认的用户名和密码(Admin/zabbix)
[root@zabbix-server yum.repos.d]# zcat /usr/share/doc/zabbix-server-mysql*/create.sql.gz | mysql -uzabbix -p zabbix

# 如果没有这个脚本的话,可以下载源码,分别导入
[root@zabbix-server mysql]# cat schema.sql |mysql -uzabbix -p zabbix
Enter password:
[root@zabbix-server mysql]# cat images.sql |mysql -uzabbix -p zabbix
Enter password:
[root@zabbix-server mysql]# cat data.sql |mysql -uzabbix -p zabbix
Enter password:
- 启动服务
[root@zabbix-server yum.repos.d]# systemctl enable zabbix-server [root@zabbix-server yum.repos.d]# systemctl start zabbix-server [root@zabbix-server yum.repos.d]# systemctl status zabbix-server # 修改时区为 Asia/Shanghai [root@zabbix-server yum.repos.d]# vim /etc/httpd/conf.d/zabbix.conf [root@zabbix-server yum.repos.d]# systemctl restart httpd - 安装客户端到
zabbix-server,无须做任何修改和调整[root@zabbix-server ~]# yum install zabbix-agent [root@zabbix-server ~]# systemctl enable zabbix-agent [root@zabbix-server ~]# systemctl start zabbix-agent - 查看服务端口
- 打开浏览器
http://zabbix-server/zabbix

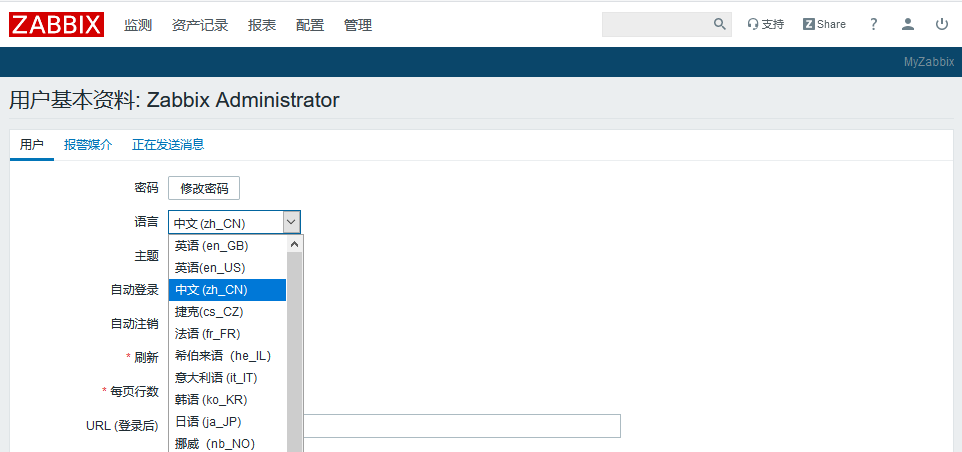
修改中文界面

2. Install Agent
2.1 准备客户端
- 下载可能用到的客户端
[root@zabbix-server ~]# cd /var/www/html/
[root@zabbix-server html]# wget https://mirrors.tuna.tsinghua.edu.cn/zabbix/zabbix/4.0/rhel/7/x86_64/zabbix-agent-4.0.26-1.el7.x86_64.rpm
[root@zabbix-server html]# wget https://www.zabbix.com/downloads/4.0.26/zabbix_agent-4.0.26-linux-ppc64le-static.tar.gz
[root@zabbix-server html]# wget https://www.zabbix.com/downloads/4.0.26/zabbix_agent-4.0.26-windows-amd64.zip
[root@zabbix-server html]# wget https://www.zabbix.com/downloads/4.0.7/zabbix_agent-4.0.7-aix-7.2-powerpc.tar.gz
[root@zabbix-server html]# wget https://www.zabbix.com/downloads/3.4.0/zabbix_agent-3.4.0-aix-7.1-powerpc.tar.gz
[root@zabbix-server html]# wget https://www.zabbix.com/downloads/4.0.1/zabbix_agent-4.0.1-aix-6.1-powerpc.tar.gz
[root@zabbix-server html]# wget https://www.zabbix.com/downloads/1.8.3/zabbix_agent-1.8.3-aix-5.3.10-powerpc.tar.gz
[root@zabbix-server html]# wget https://www.zabbix.com/downloads/2.4.4/zabbix_agent-2.4.4-aix-5.3.06-powerpc.tar.gz
2.2 RHEL/CentOS
使用yum或rpm进行安装,agent包依赖很少,几乎不需要单独安装依赖包;
rpm -ivh zabbix-agent-4.0.26-1.el7.x86_64.rpm
vim /etc/zabbix/zabbix-agent.conf
systemctl enable zabbix-agent.service
systemctl start zabbix-agent.service
zabbix-agent.conf需要修改的几个参数,类似下面这几个
PidFile=/var/run/zabbix/zabbix_agentd.pid
LogFile=/var/log/zabbix/zabbix_agentd.log
Server=172.16.102.101
ServerActive=172.16.102.101
Include=/etc/zabbix/zabbix_agentd/*.conf
Hostname=node1
HostMetadata=linux
- PidFile:杀死进程用
- LogFile:写日志
- Server:被动模式服务器
- ServerActive: 自动发现或者自动注册用
- Include:手动添加监控项用
- Hostname: 主机名
- HostMetadata: 主动注册用
2.3 AIX
有些版本的客户端需要包比较特殊,所以尽量选择不需要单独安装额外依赖的客户端
- aix 6.1 : 2.x
- aix 7.1 : 3.4
- aix 7.2 : 3.4
配置文件/etc/zabbix/zabbix_agentd.conf
-bash-4.2# cat /etc/zabbix/zabbix_agentd.conf
PidFile=/var/run/zabbix/zabbix_agentd.pid
LogFile=/var/log/zabbix/zabbix_agentd.log
Server=172.16.102.101
ServerActive=172.16.102.101
Include=/etc/zabbix/zabbix_agentd/*.conf
Hostname=hanode2
HostMetadata=aix
自启动文件/etc/rc.d/rc2.d/Szabbixagentd
-bash-4.2# cat /etc/rc.d/rc2.d/Szabbixagentd
#!/bin/sh
##########################################################
###### Zabbix agent daemon init script
##########################################################
case $1 in
start)
    su zabbix -c "/usr/local/bin/zabbix/zabbix_agentd" ;;
stop)
    kill -TERM `cat /var/run/zabbix/zabbix_agentd.pid` ;;
restart)
    $0 stop
    sleep 5
    $0 start
    ;;
stat)
    [ -f /var/run/zabbix/zabbix_agentd.pid ] &&
            echo "Zabbix agent is running." ||
            echo "Zabbix agent is NOT running."
    ;;
*)
    echo "Usage: $0 start|stop|restart"
    exit 1
esac
附录aix客户端自动安装脚本
2.4 Windows
二进制文件
/cygdrive/c/zabbix_agent $ ls
dev  zabbix_agentd.conf  zabbix_agentd.exe  zabbix_agentd.log  zabbix_get.exe  zabbix_sender.exe
配置文件
$ cat zabbix_agentd.conf
LogFile=c:\zabbix_agent\zabbix_agentd.log
Server=172.16.102.101
ServerActive=172.16.102.101
Hostname=mywindows
HostMetadata=win
自启动
zabbix_agentd.exe -i  -c c:\zabbix_agent\zabbix_agentd.conf   # 安装服务 默认conf为c:\zabbix_agentd.conf
zabbix_agentd.exe  -s   # 启动服务